windows及ubuntu下使用qemu串口调试的方法。
(一些截图里使用了efiguard引导,不用在意)
windows 10下
下载qemu安装包:https://qemu.weilnetz.de/w64/
- 固件启动
qemu-system-x86_64.exe -bios "OVMF.fd" -net none- 指定目录为磁盘
qemu-system-x86_64.exe -bios "OVMF.fd" -net none -hda fat:rw:C:\programs\efiguard-test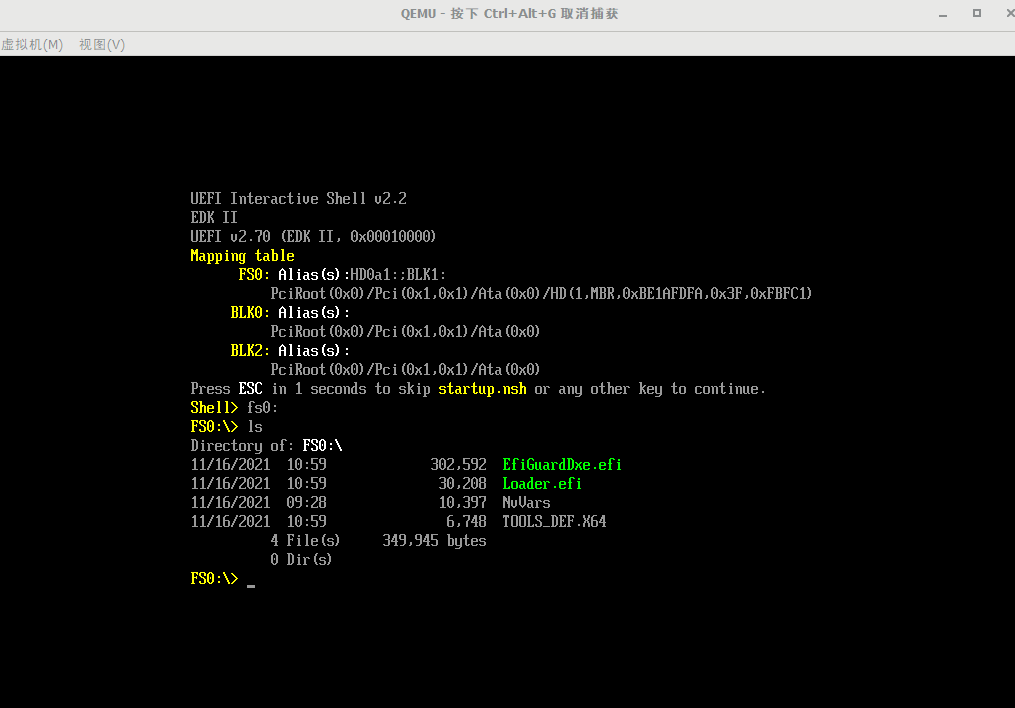
- 模拟串口打印
qemu-system-x86_64.exe -bios "OVMF.fd" -net none -hda fat:rw:C:\programs\efiguard-test -serial stdiostdio选项会在命令行打印串口信息:

但乱码偏多,不易阅读,用虚拟串口驱动工具Virtual Serial Port Driver来模拟两个串口,一个供qemu使用,一个用于接收串口数据。
点Add virtual pari:
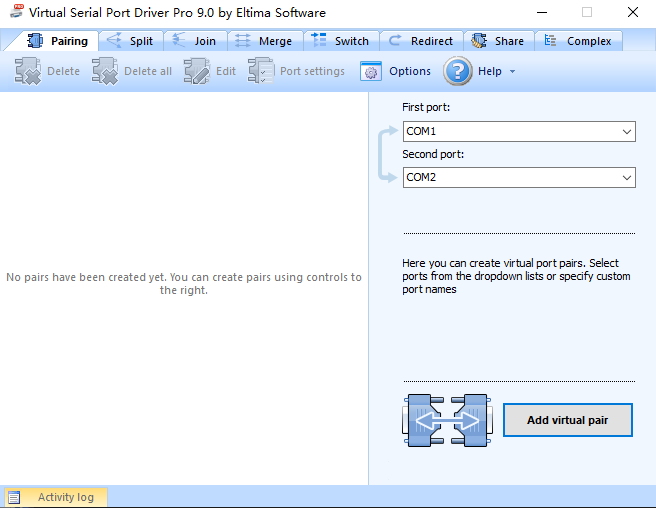
可看到设备管理器中新增了两个串口:

再用qemu启动,注意修改stdio为串口号COM1:
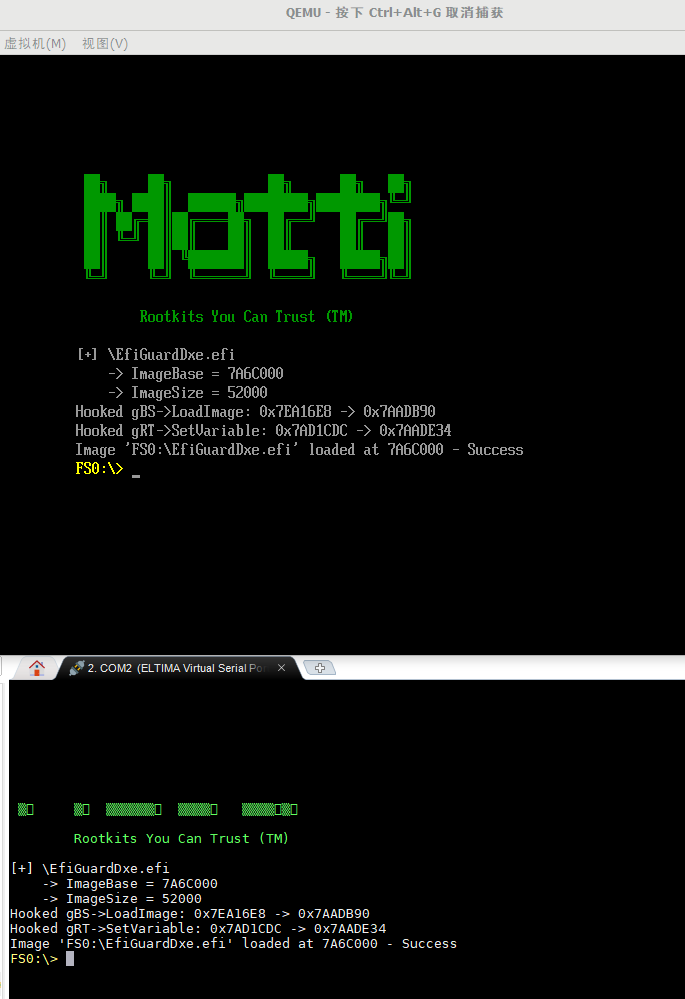
qemu-system-x86_64.exe -bios "OVMF.fd" -net none -hda fat:rw:C:\programs\efiguard-test -serial COM1监听COM2,可看到串口输出:
linux ubuntu下
安装qemu:
sudo apt install qemu qemu-system qemu-user-static- 创建win10虚拟机
虚拟机需启用VT-x
创建虚拟硬盘:
qemu-img create -f qcow2 win10x64.img 20G安装脚本如下,使用ubuntu系统目录下的OVMF作为引导固件:
#!/bin/sh
/usr/bin/qemu-system-x86_64 \
-machine type=q35,accel=kvm:tcg \
-cpu host \
-smp cpus=2,cores=2,threads=1,sockets=1 \
-bios /usr/share/OVMF/OVMF_CODE.fd \
-m 2G \
-k en-us \
-name "Microsoft Windows 10" \
-drive file="win10x64_efi.img",if=virtio,index=0,media=disk,cache=writeback,format=qcow2 \
-drive file="Win10_2004_English_x64.iso",if=ide,index=1,media=cdrom,cache=writeback,readonly \
-drive file="virtio-win-0.1.126.iso",if=ide,index=2,media=cdrom,cache=writeback,readonly \
-usb \
-net none \
-monitor stdio \
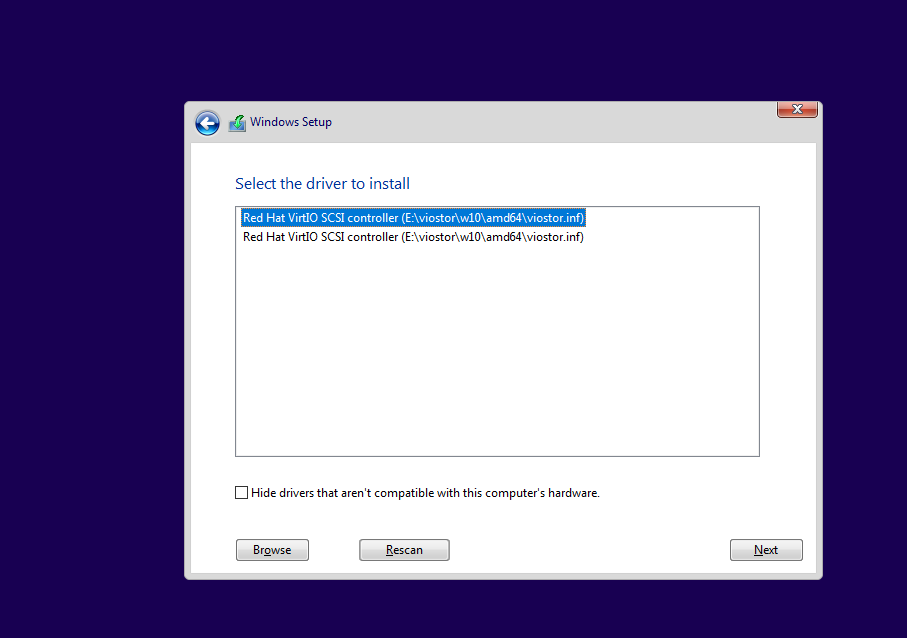
-rtc base=localtime进入安装过程,如提示无法找到磁盘,则选择Load Drivers,然后取消Hide drivers that are not compatible with this computer’s hardware复选框,点击Browse浏览文件:
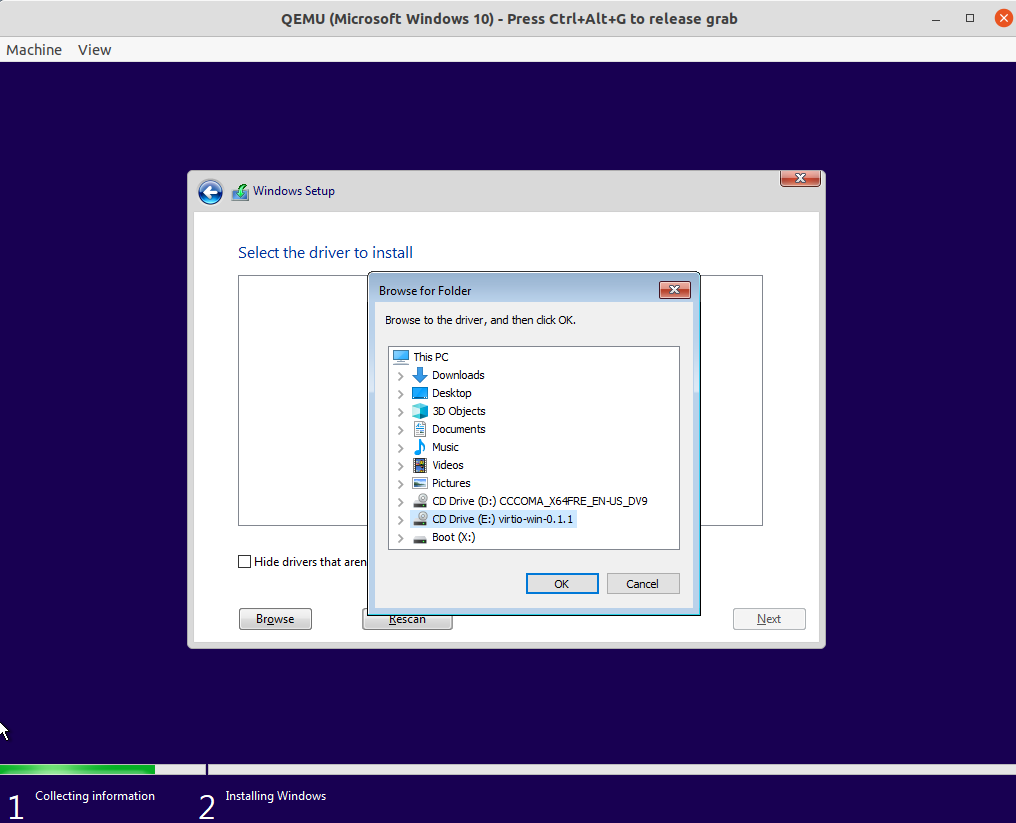
选择virtio驱动盘下的E:\viostor\w10\amd64文件夹,并打开,如下图,点击Next就能正常安装了:
- 串口输出
用socat生成虚拟串口设备:
$ socat -d -d pty,raw,echo=0 pty,raw,echo=0
2021/11/18 10:58:41 socat[2510] N PTY is /dev/pts/3
2021/11/18 10:58:41 socat[2510] N PTY is /dev/pts/4
2021/11/18 10:58:41 socat[2510] N starting data transfer loop with FDs [5,5] and [7,7]生成的/dev/pts/3和/dev/pts/4即为虚拟串口,监听/dev/pts/4设备:
cat < /dev/pts/4qemu串口输出到/dev/pts/3:
/usr/bin/qemu-system-x86_64 \
-bios OVMF.fd -net none \
-hda fat:rw:/home/edvison/qemu-win10/efi \
-serial /dev/pts/3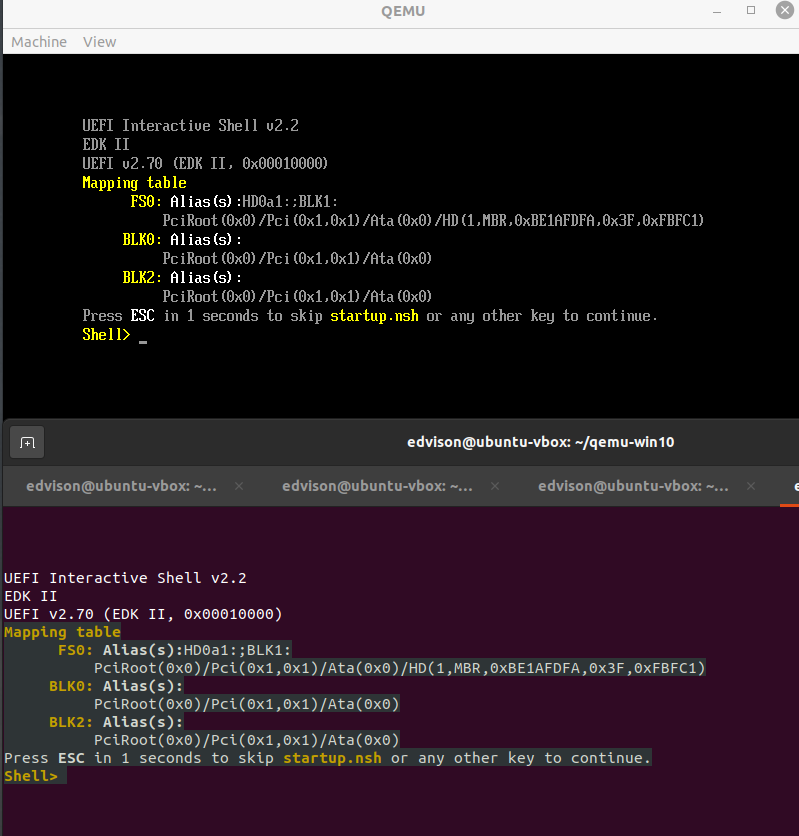
- Windows启动过程串口输出
启动脚本:
#!/bin/sh
/usr/bin/qemu-system-x86_64 \
-machine type=q35,accel=kvm:tcg \
-cpu host \
-smp cpus=2,cores=2,threads=1,sockets=1 \
-boot menu=on \
-bios /usr/share/OVMF/OVMF_CODE.fd \
-m 2G \
-k en-us \
-name "Microsoft Windows 10" \
-drive file="win10x64_efi.img",if=virtio,index=0,media=disk,cache=writeback,format=qcow2 \
-hda fat:rw:/home/edvison/qemu-win10/efi \
-usb \
-net none \
-monitor stdio \
-rtc base=localtime \
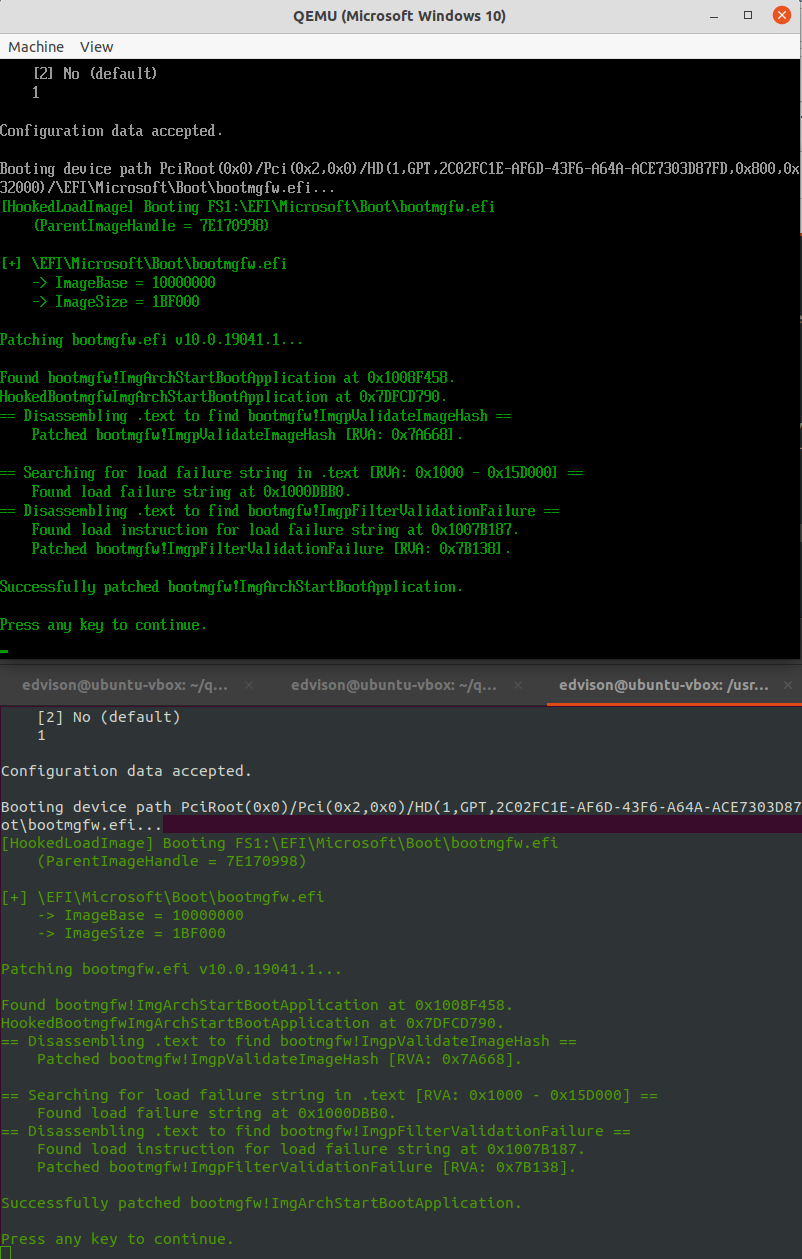
-serial /dev/pts/3启用-boot menu=on即可在启动过程中按ESC键进入BIOS设置界面,选择进入EFI Shell进行调试:
OVMF + Qemu 调试
默认的OVMF版本会把调试消息写入0x402 IO端口,用下面的qemu参数可以保存调试信息到文件:
-debugcon file:debug.log -global isa-debugcon.iobase=0x402将调试信息写入模拟串口,需在构建OVMF时添加-D DEBUG_ON_SERIAL_PORT参数,并使用qemu参数-serial file:serial.log把信息输出到文件。(可以和debugcon同时使用)
qemu调试启动脚本:
#!/bin/sh
/usr/bin/qemu-system-x86_64 \
-machine type=q35,accel=kvm:tcg \
-cpu host \
-smp cpus=2,cores=2,threads=1,sockets=1 \
-boot menu=on \
-bios OVMF_CODE-bds-serial.fd \
-m 2G \
-k en-us \
-name "Microsoft Windows 10" \
-drive file="win10x64_efi.img",if=virtio,index=0,media=disk,cache=writeback,format=qcow2 \
-hda fat:rw:/home/edvison/qemu-win10/efi \
-usb \
-net none \
-monitor stdio \
-rtc base=localtime \
-serial file:serial.log \
-debugcon file:debug.log -global isa-debugcon.iobase=0x402
windows qemu安装win 7
创建虚拟硬盘:
qemu-img.exe create -f qcow2 win7x64.img 20G安装脚本:
qemu-system-x86_64.exe ^
-bios OVMF_CODE.fd ^
-boot menu=on ^
-smp cpus=2,cores=2,threads=1,sockets=1 ^
-m 4G ^
-k en-us ^
-name "Microsoft Windows 7" ^
-hda D:\ISO\win7x64.img ^
-drive file=en_windows_7_professional_with_sp1_x64_dvd_u_676939.iso,if=ide,index=1,media=cdrom,cache=writeback,readonly=on ^
-usb ^
-net none ^
-monitor stdio ^
-rtc base=localtime ^
启动脚本:
qemu-system-x86_64.exe ^
-bios OVMF_CODE.fd ^
-boot menu=on ^
-smp cpus=2,cores=2,threads=1,sockets=1 ^
-m 4G ^
-k en-us ^
-name "Microsoft Windows 7" ^
-hda D:\ISO\win7x64.img ^
-usb ^
-net none ^
-monitor stdio ^
-rtc base=localtime ^
近期评论